Reading Time: 2 minutesSupplies for Fairy Jar
Directions
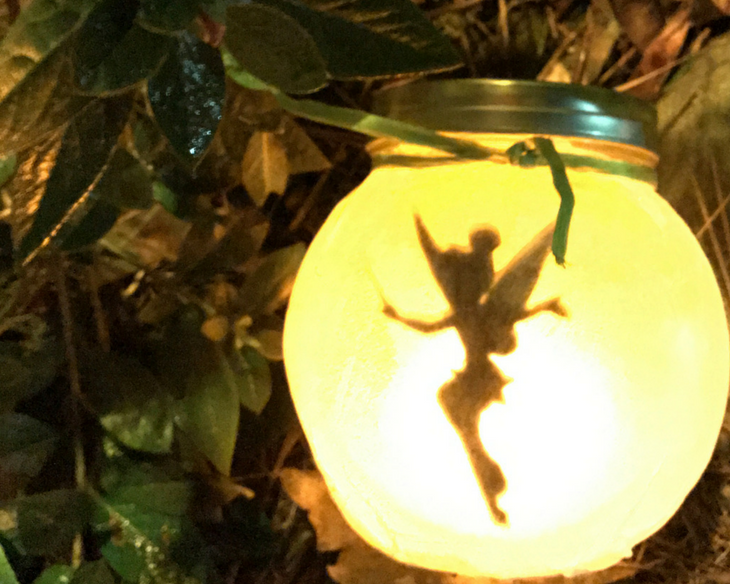
There’s no need for pixie dust. All you need is a few basic crafting supplies and some faith. These DIY fairy jars make magical decor for any fairy/woodland theme party or room.
Supplies for Fairy Jar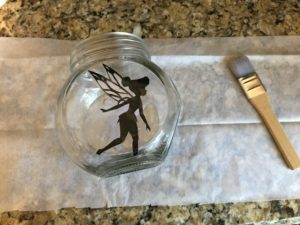
- Glass jar with lid
- Fairy or flower cut outs
- Glue (make sure it dries clear)
- Tissue paper
- Paint brush
- Glitter
- Twine
- Battery powered tea lights
NOTE: All of these items can be found at your local dollar store making each jar under $5!
Directions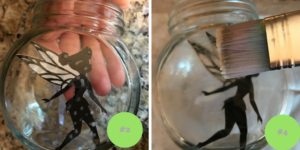
- Print and trim fairy cut outs.
- Glue the cut out to the inside of the jar.
- Use the paint brush to cover the outside of the jar in glue.
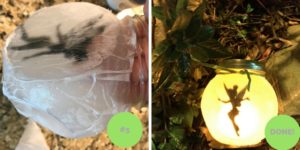
- Wrap the jar in tissue paper. (Tip: Only apply one layer to allow more light. Cut excess paper.)
- Once the jar is covered, QUICKLY apply a thin layer of glue t
 o the top
. - Apply glitter around the neck and bottom of the jar.
- Allow the jar to dry.
- Wrap a layer of twine around the neck.
- Insert a battery powered tea light inside the jar.
- Seal and enjoy!